
 254
254
Audience: All SCORE Members, SCORE Headquarters Staff & Contractors
Introduction
List views allow you to see particular segments of your data. This guide will walk you through building a list view that will identify the data you need by sorting or filtering fields.
The guide includes examples of common list views, contributed by our dedicated volunteers, and setup instructions.
Table of Contents
- Create a Custom List View
- Create a Custom List View Chart
- Select Fields to Display
- How to Delete a Custom List
- Examples of Customised List Views and Settings
________________________________________________________________________________________________________
How to Create a Custom List View
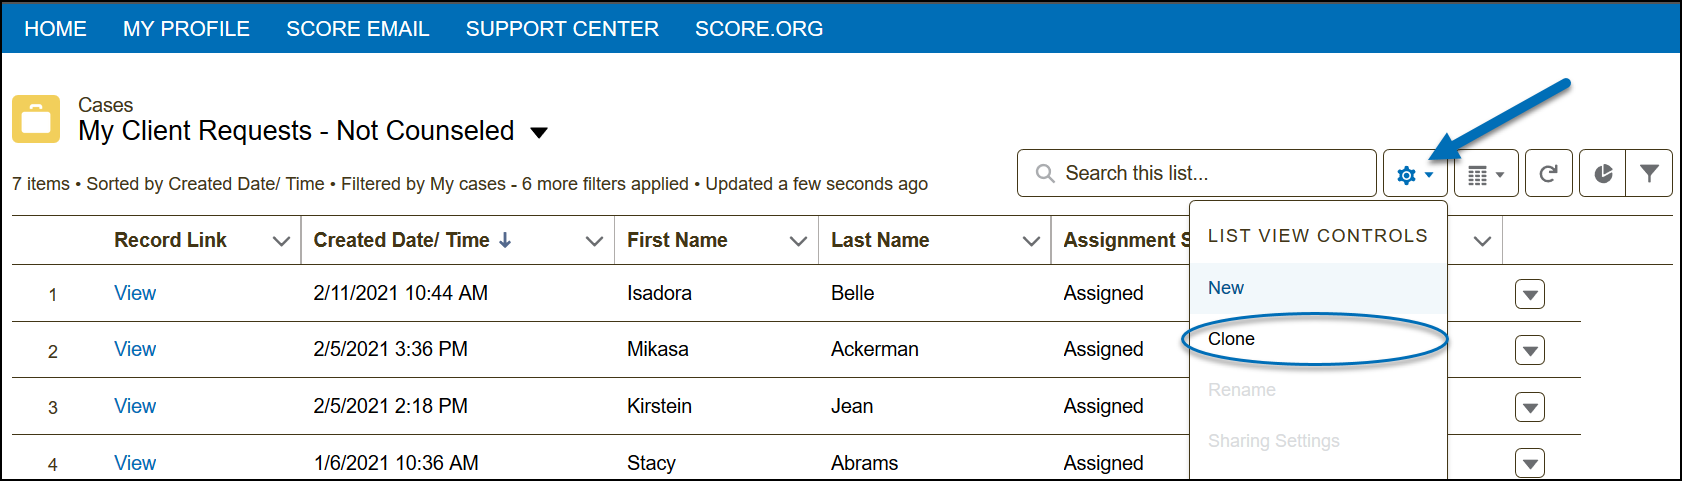
1) Open any existing list view.
2) From the list view controls ![]() , select Clone.
, select Clone.
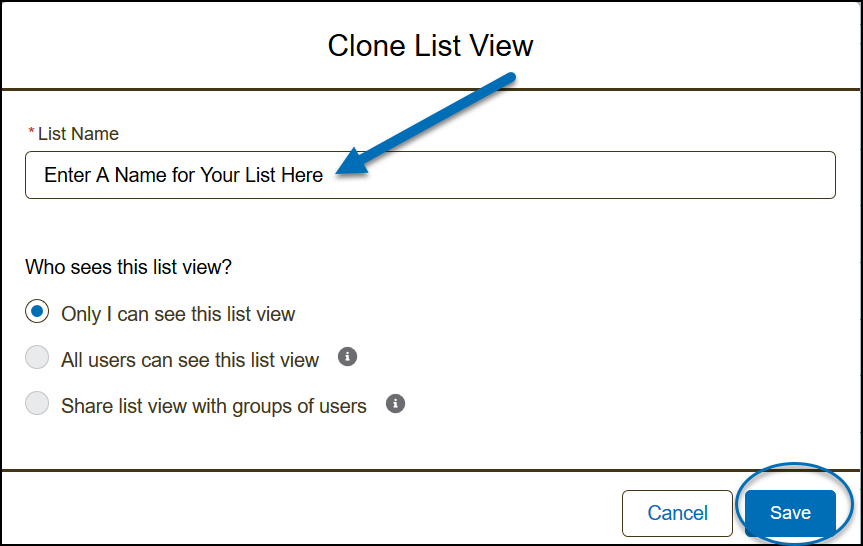
3) Enter a List Name in the field provided and click Save.
4) After clicking Save, the Filter option opens. Add/remove filters from this panel.
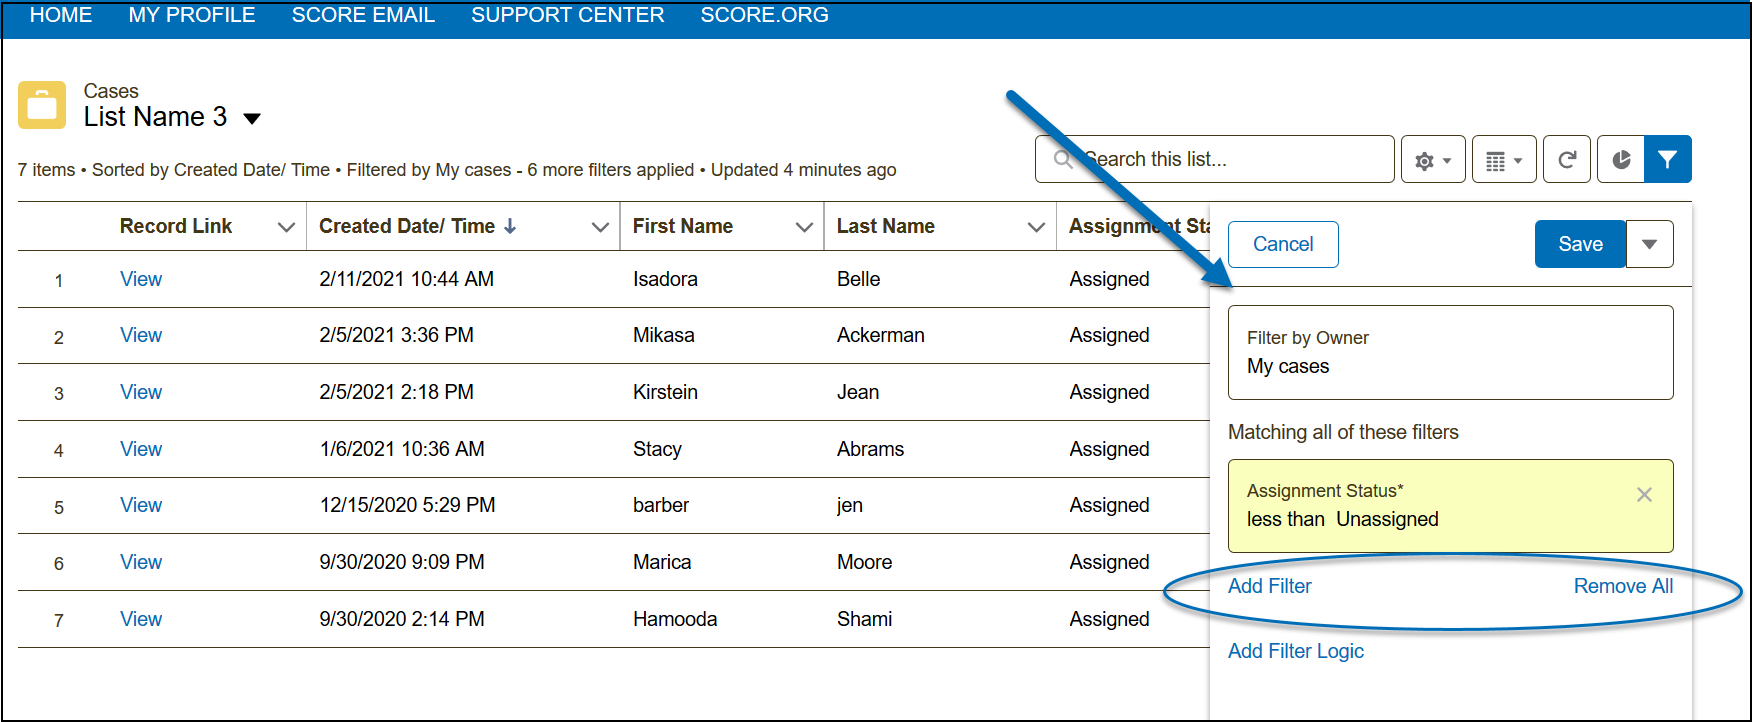
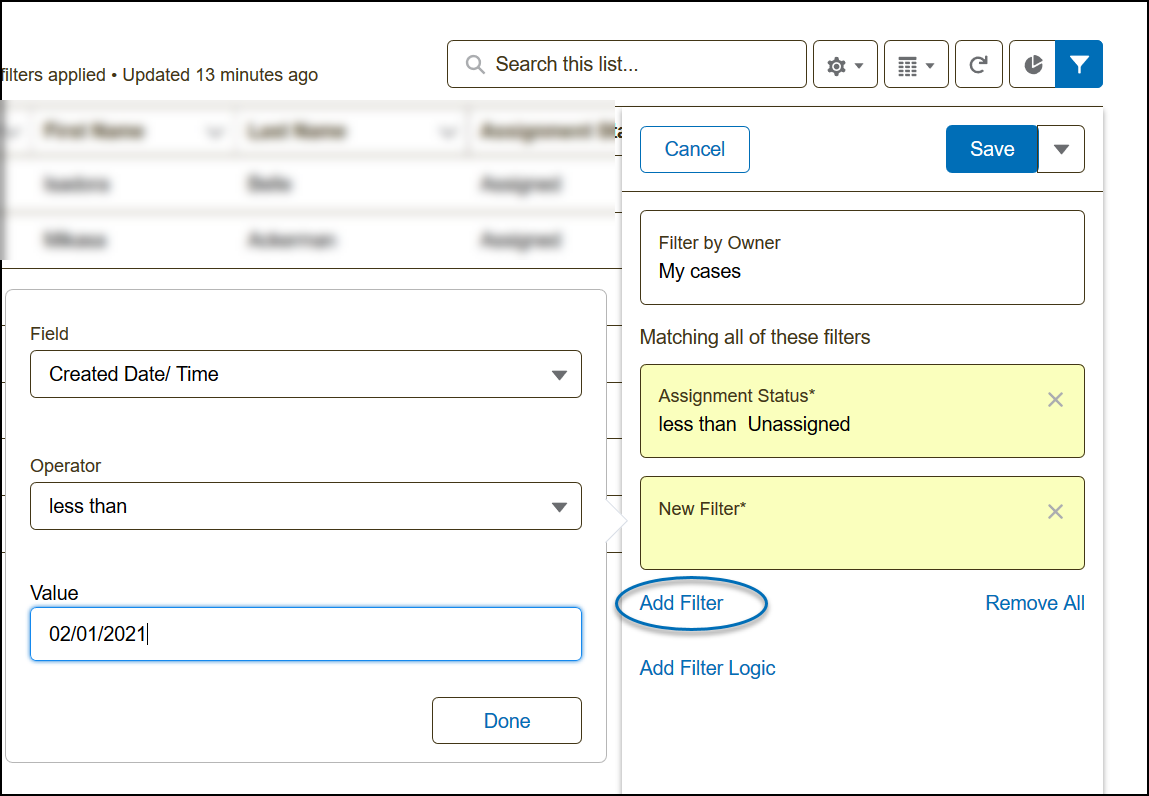
4a) To Add a Filter, select Add Filter. This will open a window on the left. Select the Field to filter, assign an Operator, and enter a Value. Click Done and the filter will not be added to your list view.
4b) To remove a filter, click the ![]() button on the top right of the filter. You also have an option to Remove All filters.
button on the top right of the filter. You also have an option to Remove All filters.
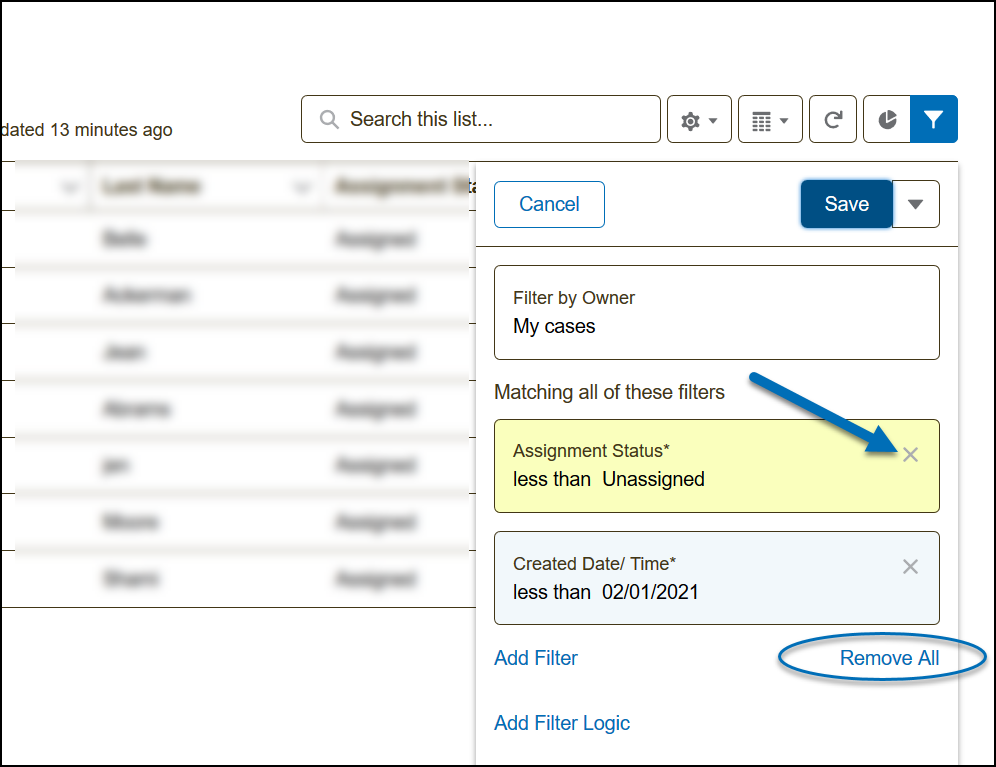
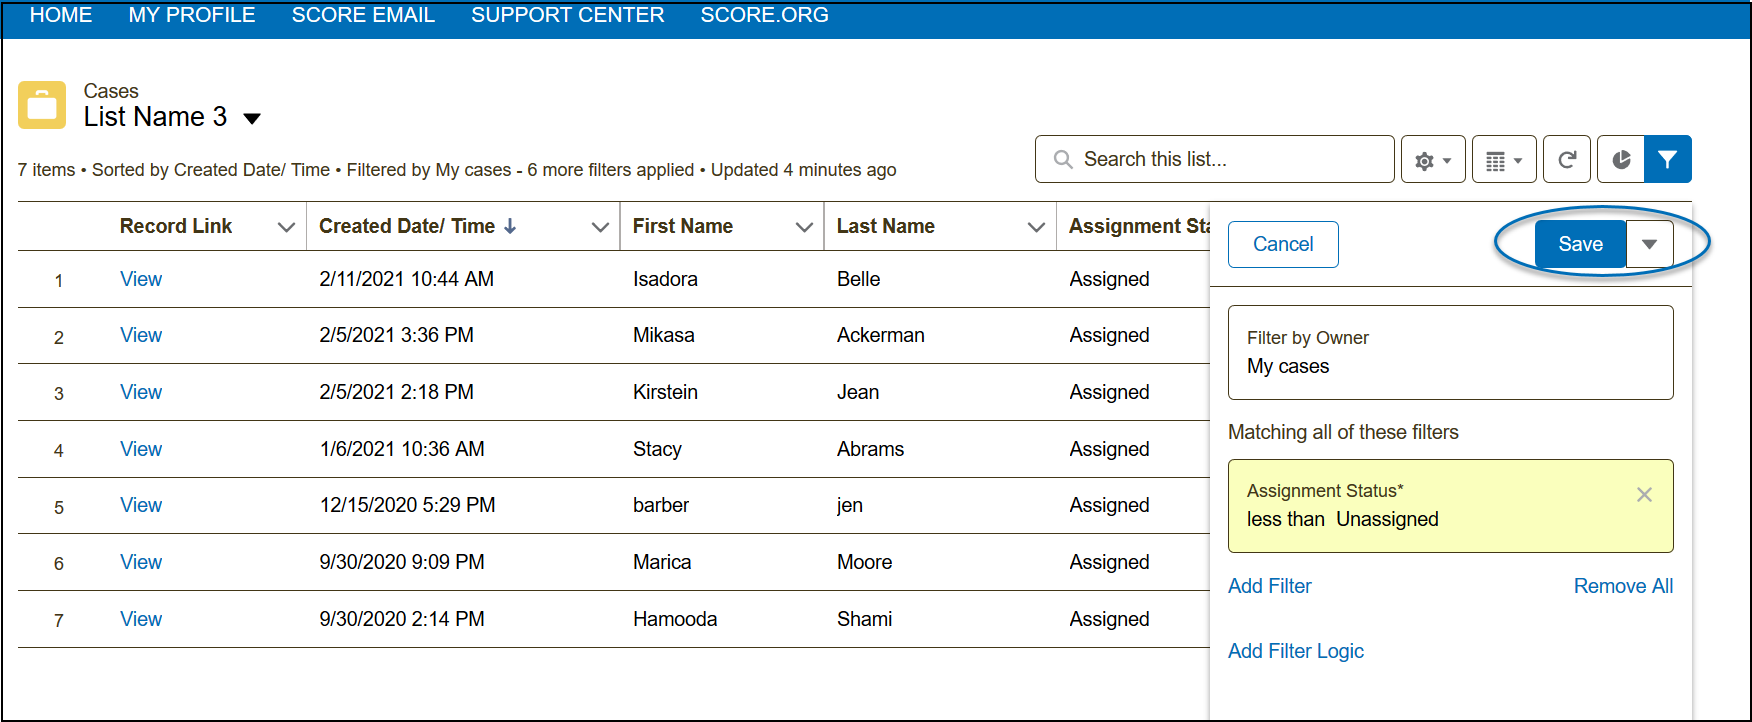
5) When done adding/removing filters, you can now click Save to save the changes and create your new list according to your filters. Note: After saving, the Filter panel remains open. You can close this by clicking the ![]() on the top right of the panel.
on the top right of the panel.
How to Create a Custom List View Chart
1) Select a list view.
2) Click the chart icon ![]() .
.
3) Then, click the New Chart button. Note: If you have existing charts, click the cogwheel icon below the existing chart and then select New Chart.
4) Enter the Chart Name and modify any fields applicable. Note: The Aggregate Type specifies how the field data is calculated: by sum, count, or average. The Aggregate Field specifies the type of data to calculate. The grouping field labels the chart segments.
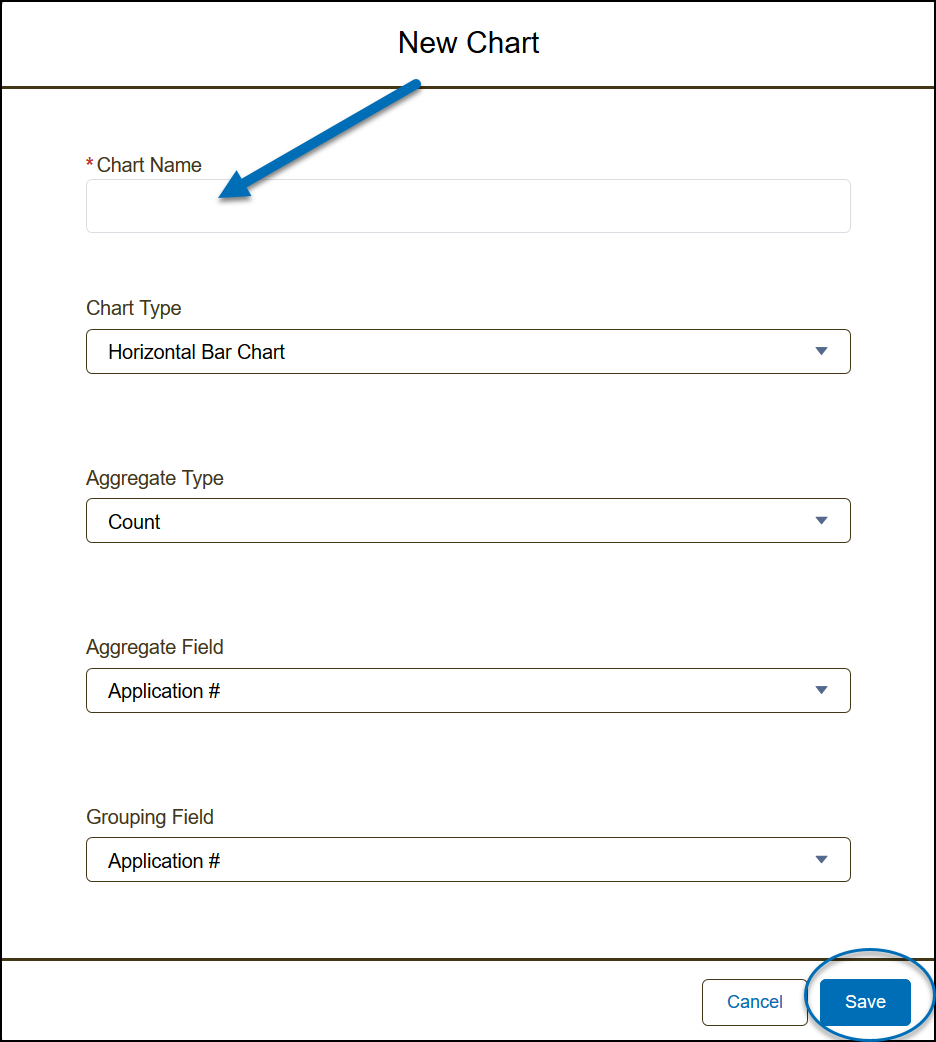
5) Click Save.
How to Select Fields To Display in a List
Use the steps here if you'd like to add more columns to your existing list.
1) From the list view controls ![]() , select Select Fields to Display
, select Select Fields to Display

2) Select the field to make visible from the Available Fields, and click the right arrow to move the selected field to the Visible Fields box. Click Save.
Notes: Press ctrl on a Windows device or command on a Mac to select multiple items by clicking on them. Also, to re-order the Visible Fields, click the up and down arrows to the right of the Visible Fields box.
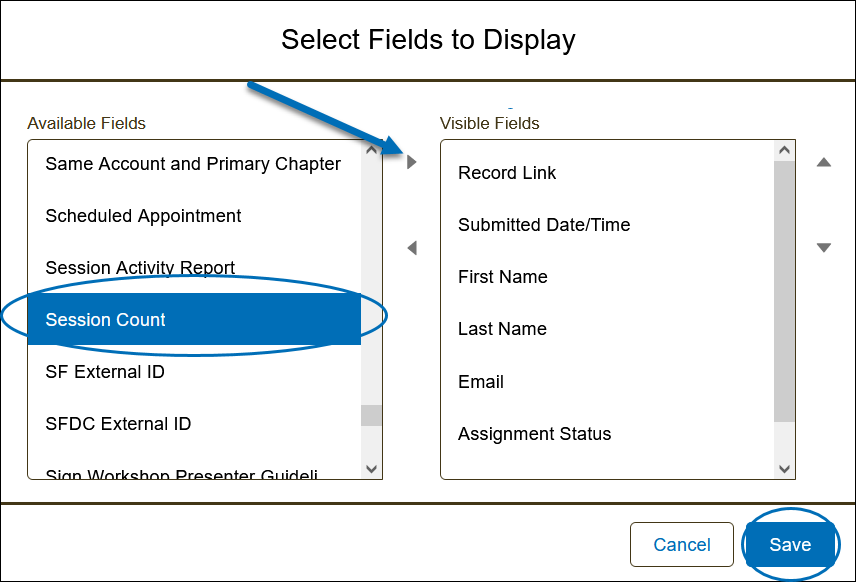
3) The new column will now appear in your list view.
How to Delete a Custom List
1) Select the custom list view.
2) From the list view controls ![]() , select Delete.
, select Delete.
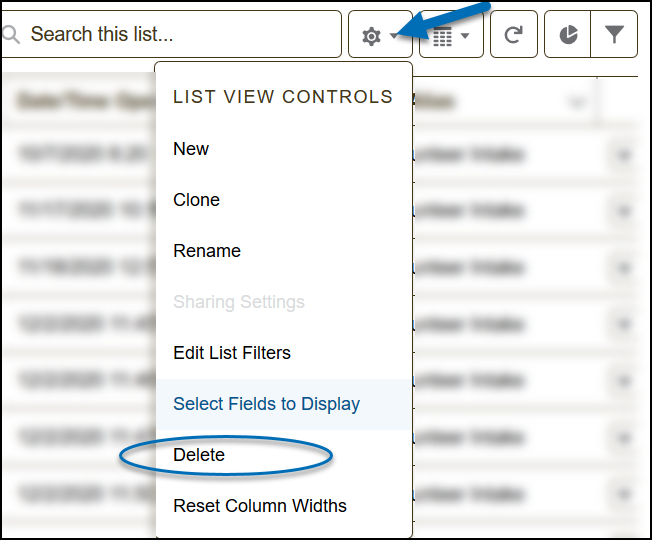
3) Confirm Delete and it will permanently remove the customized list view.

Examples of Customized List Views and Settings
Thanks to the efforts of our volunteers, we were able to build these examples from your contributions, suggestions, and feedback that you've sent to our Engage Team at [email protected].
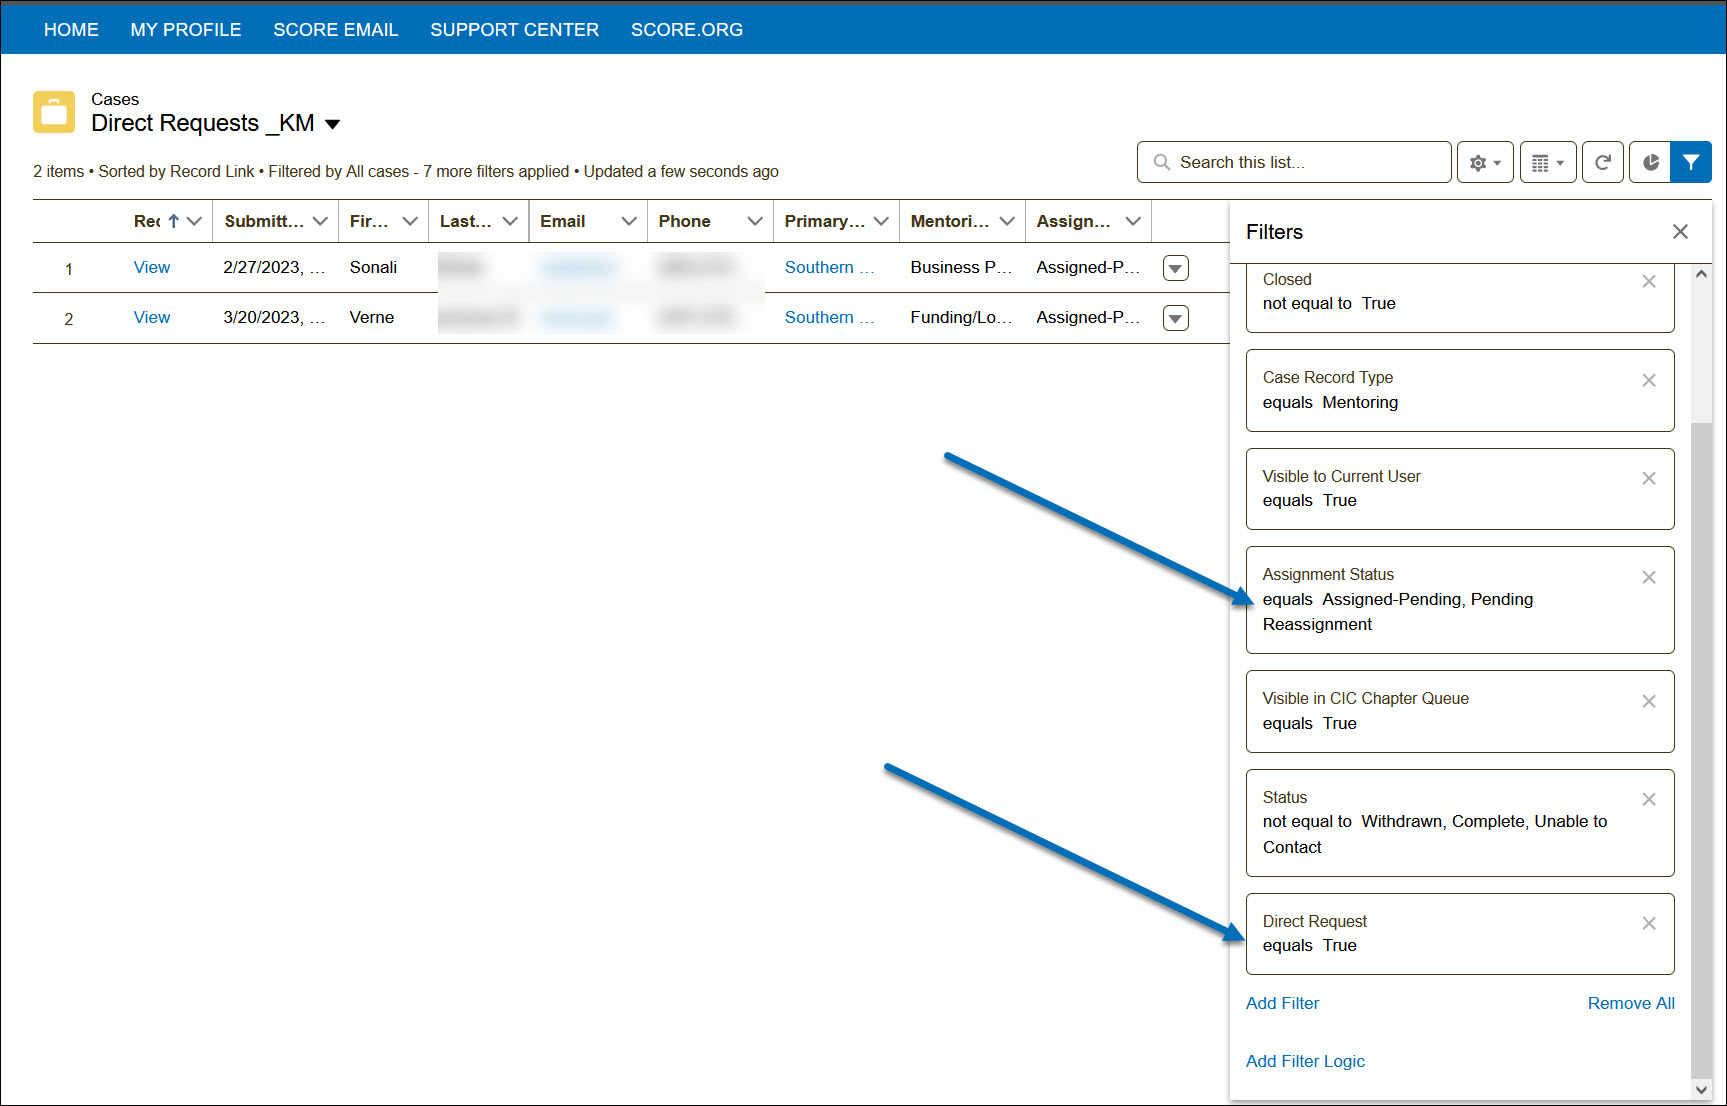
Example 1 - Direct Request MRE only List View
Audience: Client Intake Coordinator
Settings: Follow the steps on how to clone a customized view.
Suggestion: Clone the list view for Chapter Client Requests by Status.
Then, adjust Assignment Status accordingly and Add Filter: Direct Request equals True.
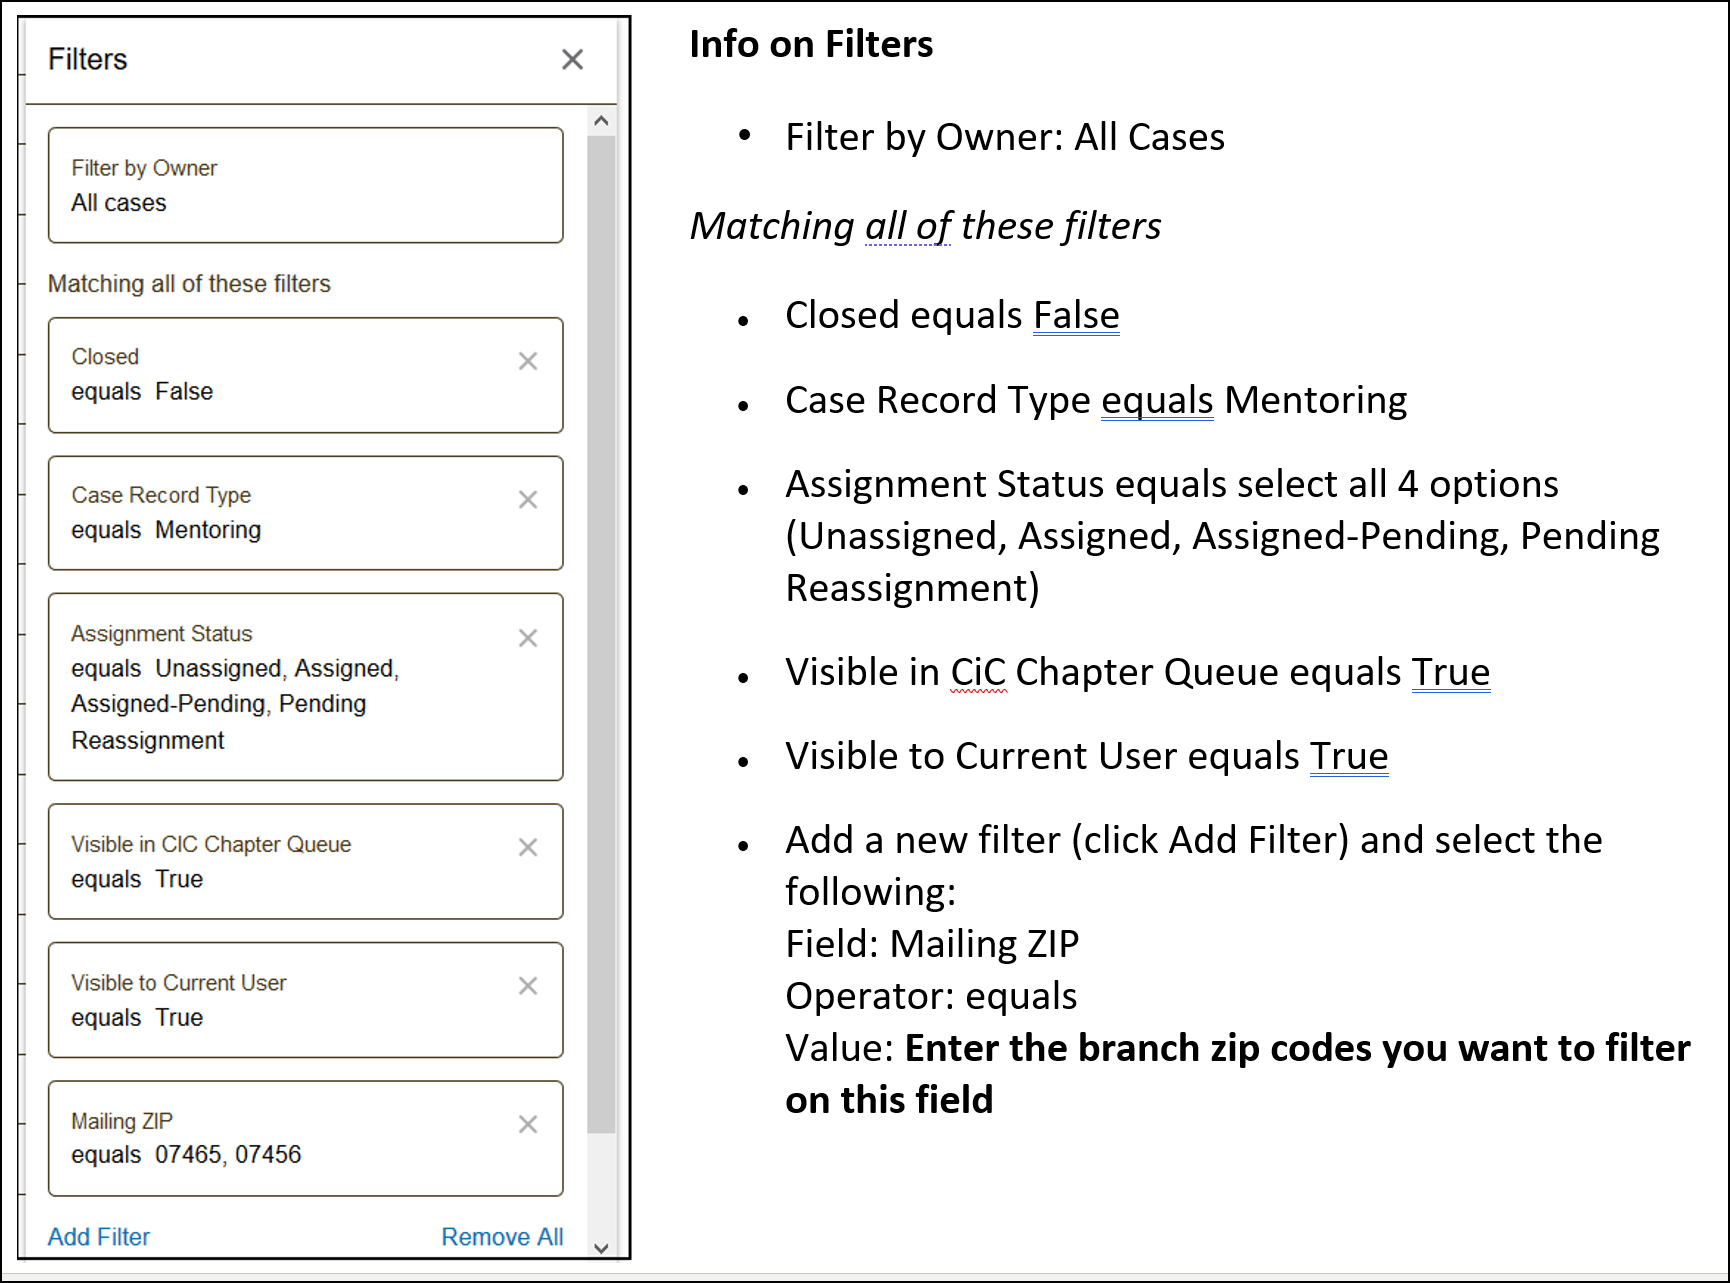
Example 2 - Chapter Client Requests by Branch
Audience: Client Intake Coordinator
Settings: Follow the steps on how to clone a customized view.
Suggestion: Clone the list view for Chapter Client Requests by Status.
Then Add Filter for Mailing ZIP equals <enter zip code, use comma to separate the items>.
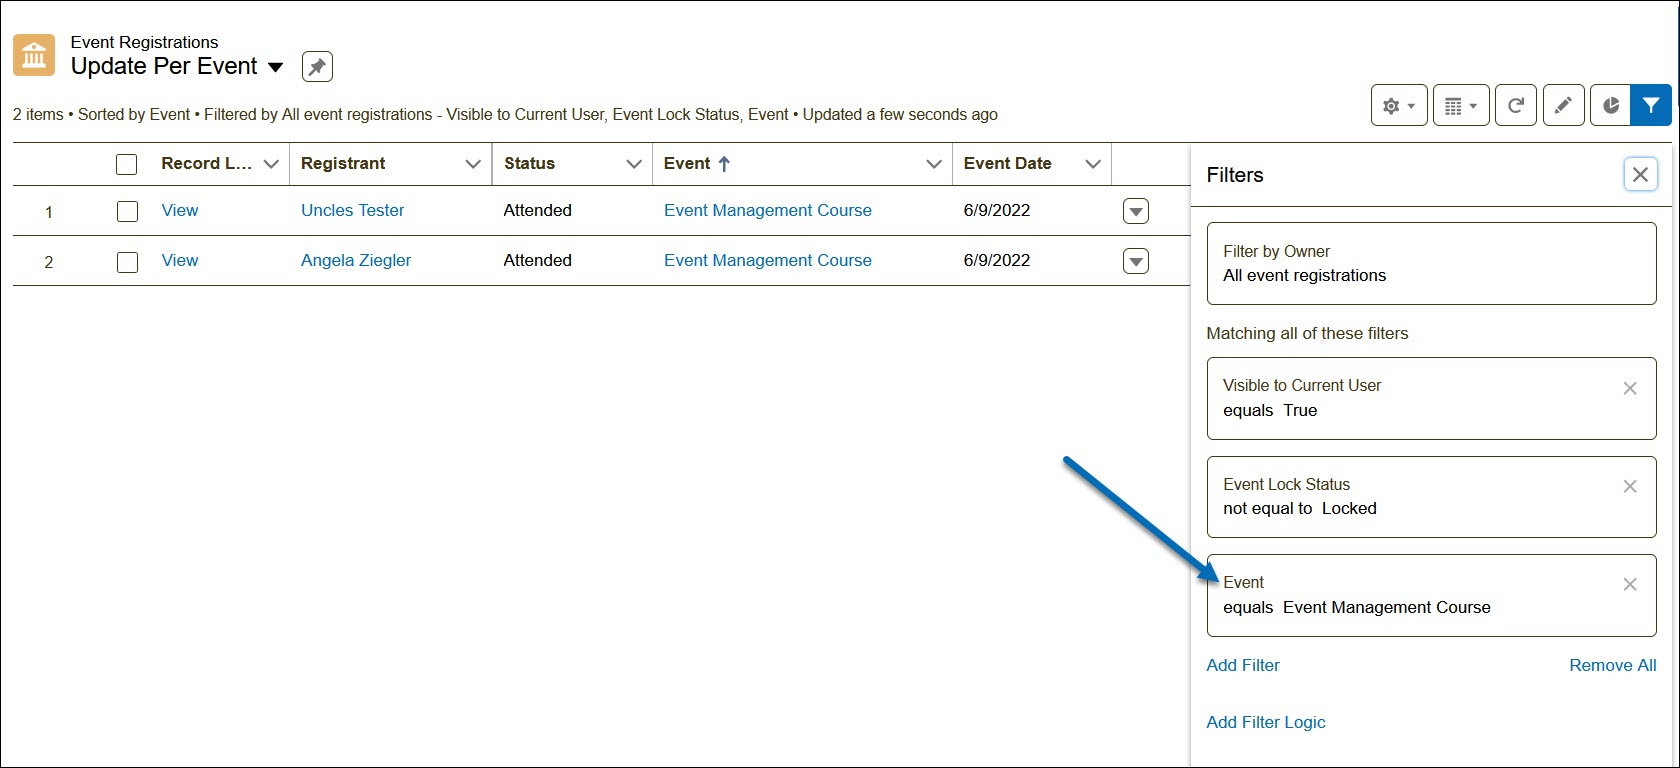
Example 3 - Update Registrants for a Single Event
Audience: Event Managers
Settings: Follow the steps on how to clone a customized view.
Clone the list view for Update Registrations.
Then Add Filter for Event equals <enter the event name as it appears on the Event column; it is case sensitive>.
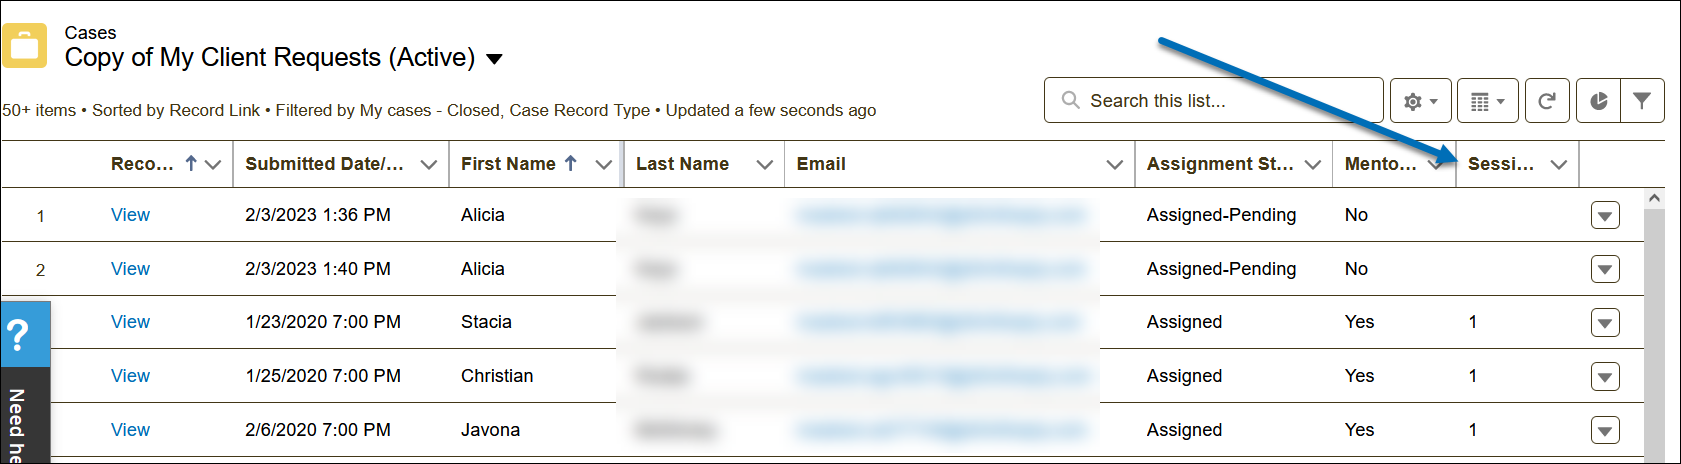
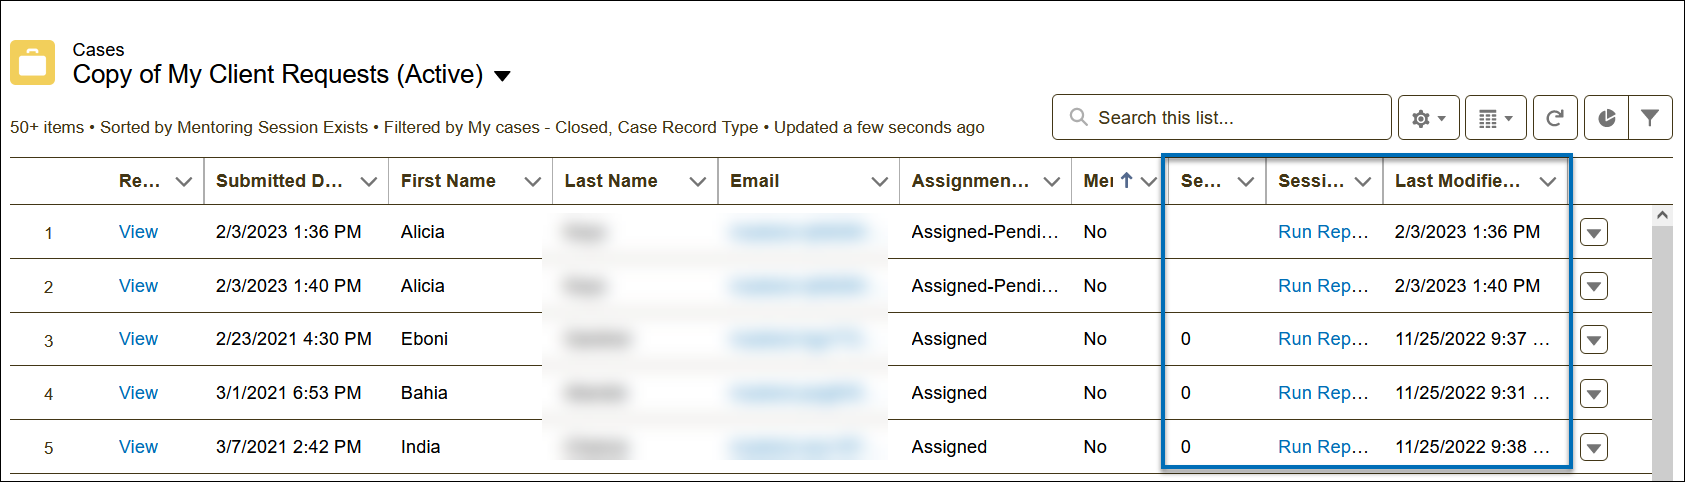
Example 4 - Adding more Columns to the My Client Requests List
Audience: Active Mentors
Settings: Follow the steps on how to clone a customized view.
Clone the list view for My Client Requests
Follow the steps to Select Fields to Display and add the following columns to be displayed: Session Count, Session Activity Report, Last Modified Date
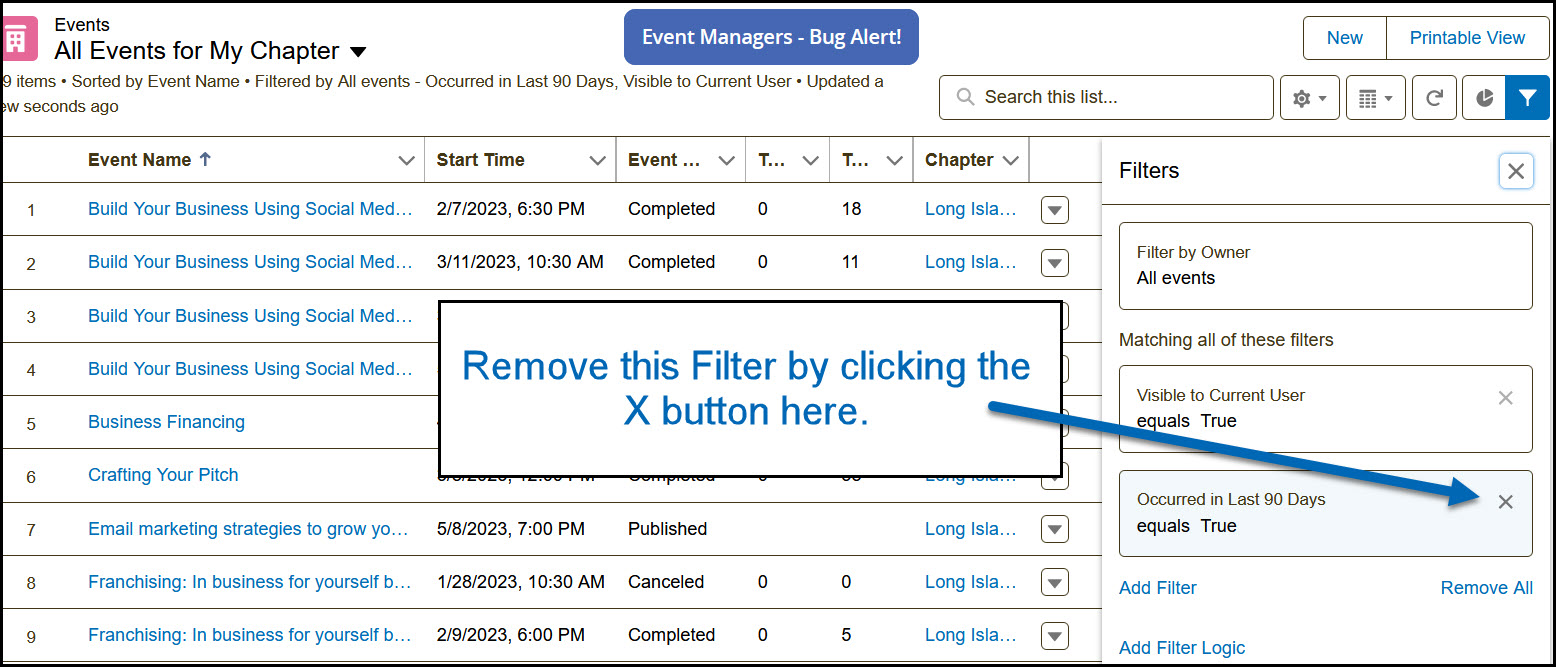
Example 5 - Customize an Event List
Audience: Event Managers
Settings: Settings: Follow the steps on how to clone a customized view.
Clone: Events - Last 90 Days
Steps: In the filter page, remove the filter for Occurred in Last 90 Days equals True.
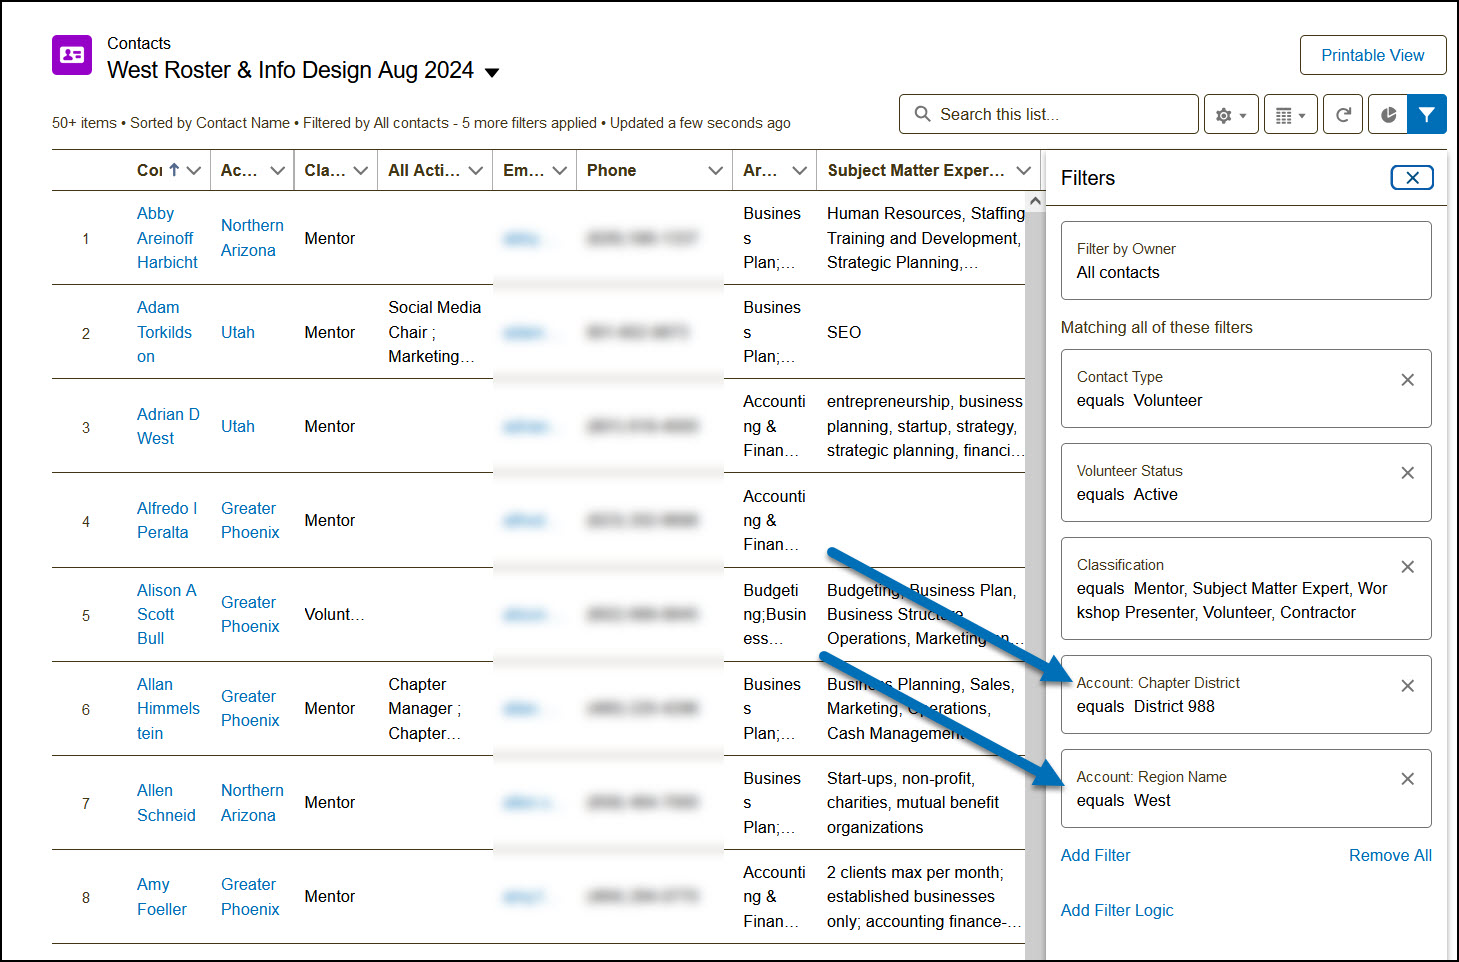
Example 6 - District Roster/Region Roster
Audience: Chapter Leaders
Settings: Follow the steps on how to clone a customized view.
Clone the list view for My Available Mentors & SMEs
Follow the steps to Select Fields to Display and add the following columns to be displayed: Account: Chapter District and/or Account: Region Name
Optional: Edit the Classification field
Relevant Resources:

