
 0
0
Audience: Event Manager
Introduction
While planning and managing an event, an Event Manager may need to access information about event registrants. This article walks you through how to access a registrant record.
Note: To view the full list of notifications for the Event Journey, click here. (You must be signed in to your @scorevolunteer.org account.)
Table of Contents:
- Viewing Registrants
- Registration Status Descriptions
- How to Manage Waitlisted
- Manually Add Registrants to an Event
- Best Practices in Managing Registrants
View & Edit Registrants
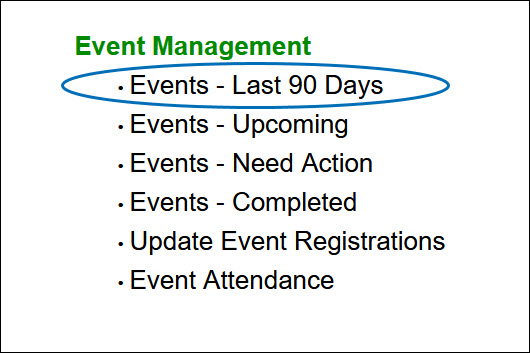
1) From the Home Page, select Events - Last 90 Days. Note: Other list views can also be used here: Upcoming, Need Action, Completed.
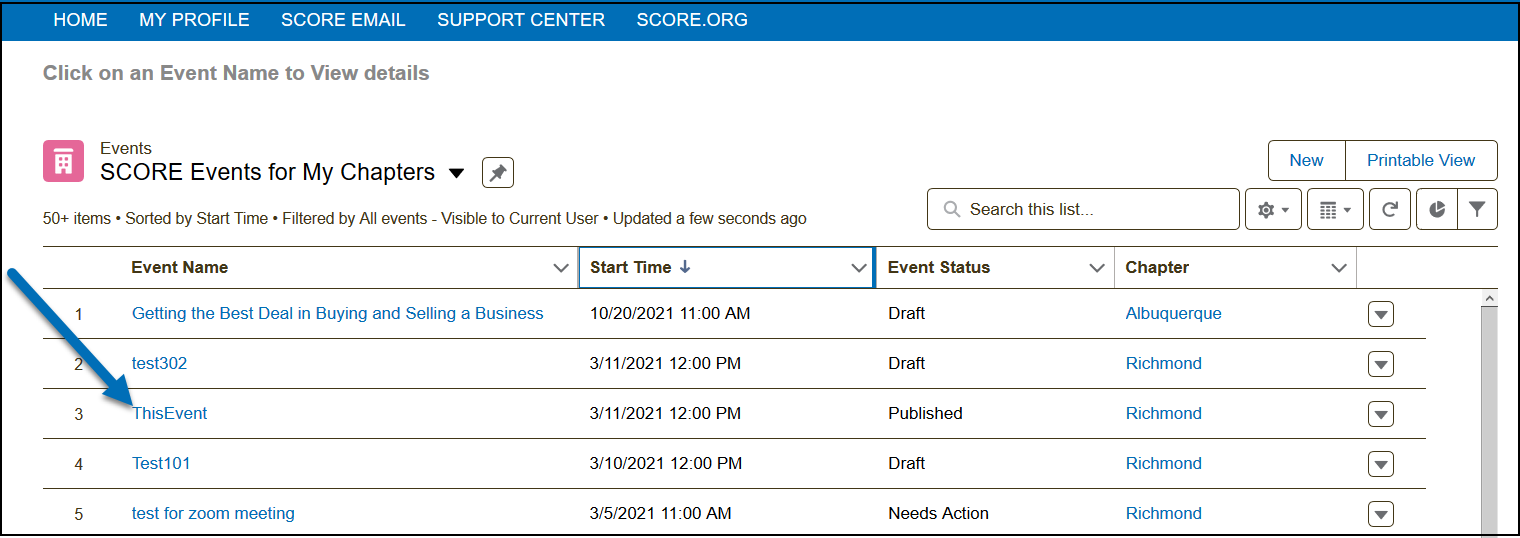
2.) Select the record by clicking the event name.
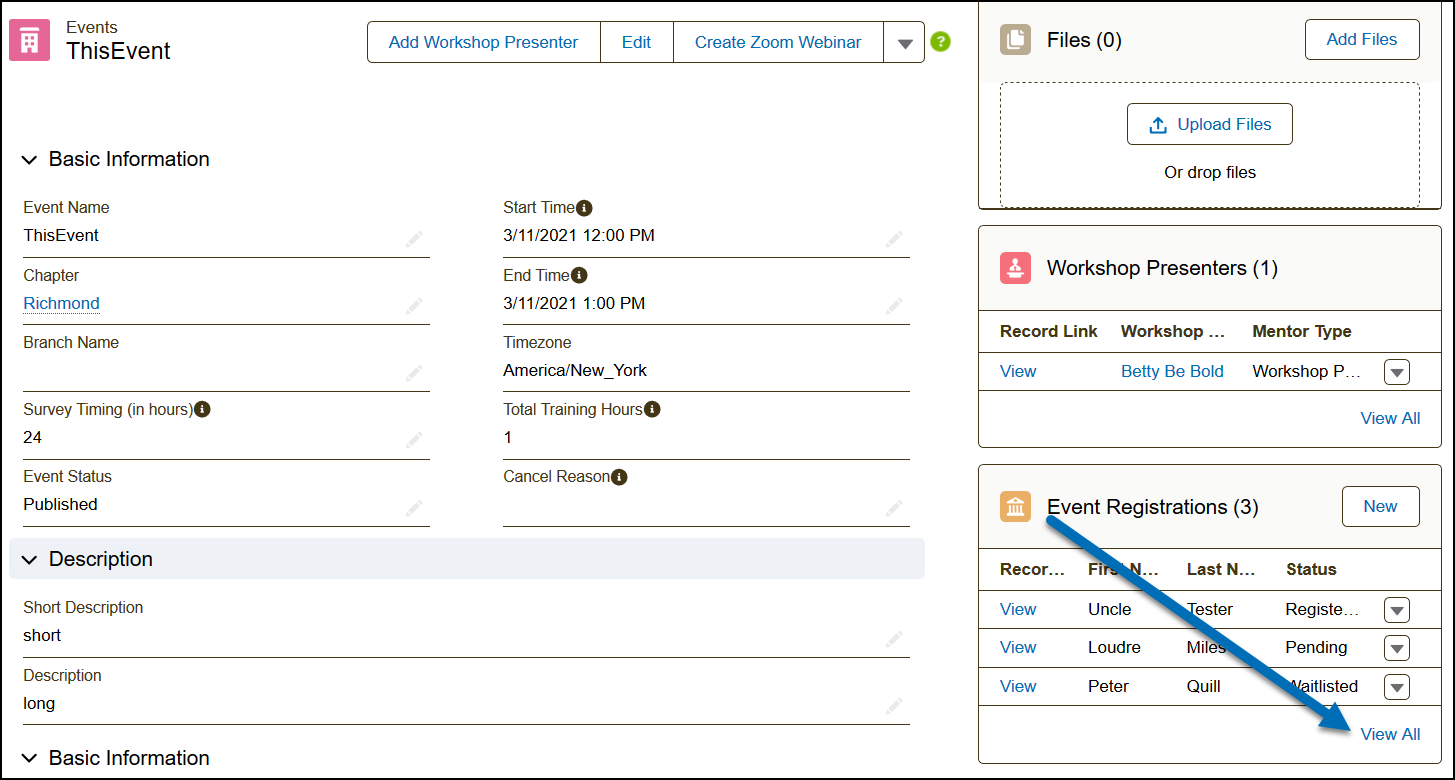
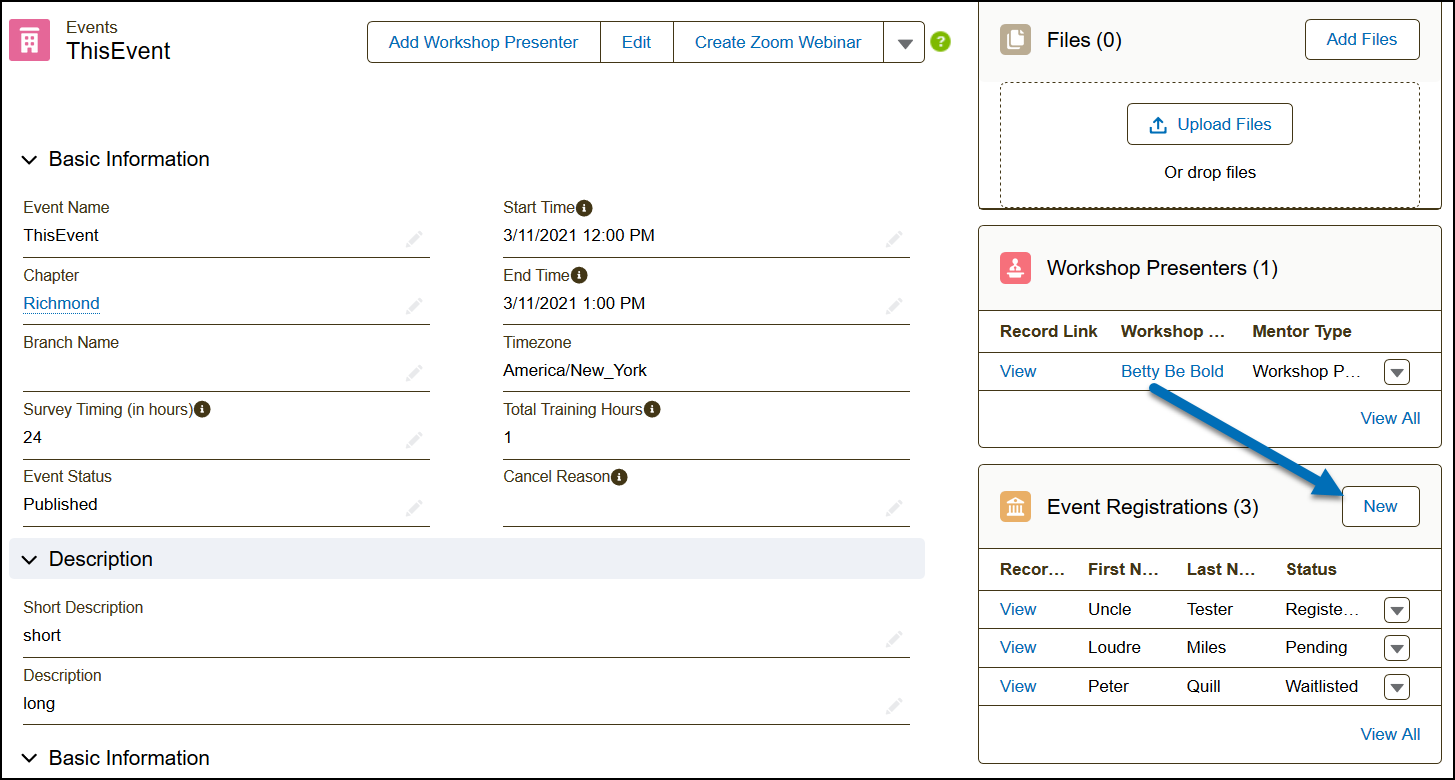
3.) From the related lists, under the Event Registrations section, click View All.
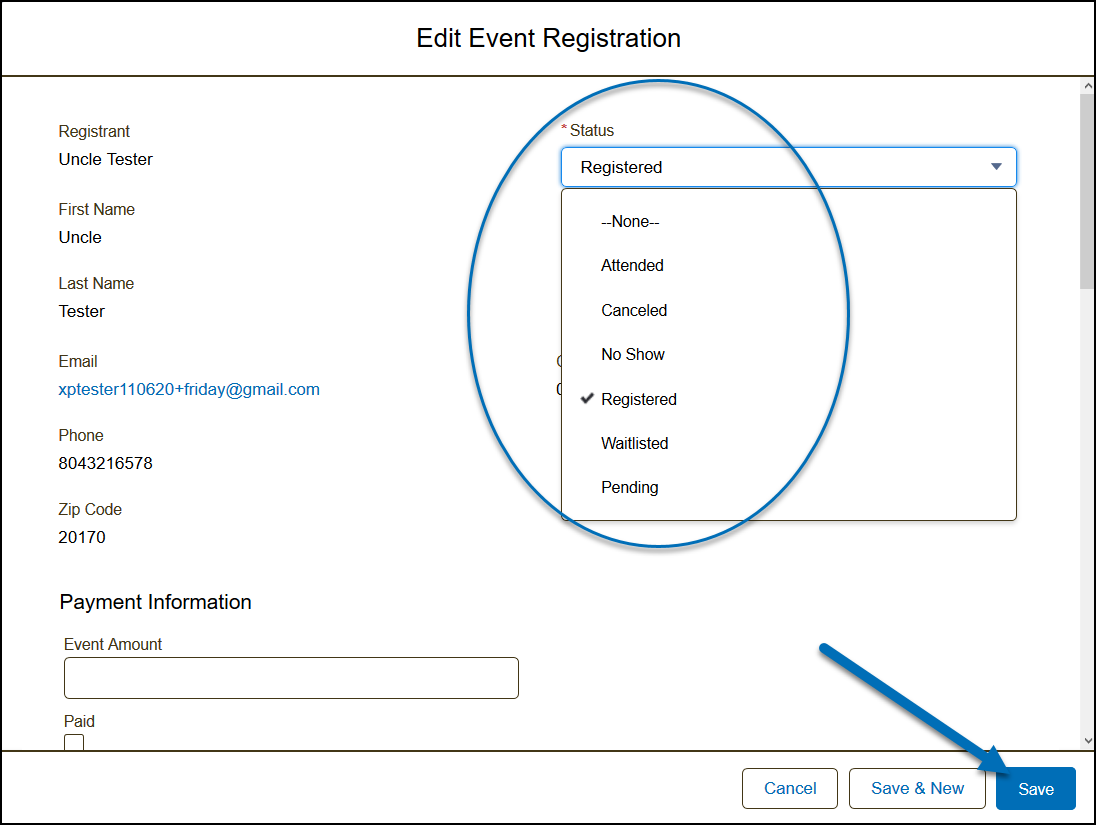
4.) Click the drop-down arrow ![]() of the record you want to modify and select Edit.
of the record you want to modify and select Edit.

5.) To edit the status of the registrant, select a new value from the drop-down. To save the changes, click Save.
Registration Status Descriptions
Understand the different registration statuses by reading their descriptions and features below.
| Status | Description | Event Manager Action | Client Notification Email Sent |
| Waitlisted | When an event is created to have a limited number of registrants and an open waitlist then the system places a registrant in a waiting list for an event when the limit has been reached. | The Event Manager will manually move a registrant from waitlisted to registered when there is a space for them in the event. | 1 Email sent letting them know they are waitlisted |
| Registered | This status signifies that the registrant has been confirmed to attend the event. | None |
Reminder Email (sent 24 hours before the event) 3 Emails sent if using Zoom Integration |
| No Show | This is status is used for the post-event process. This signifies that the registrant did not attend the event. | None | |
| Canceled |
When a registrant cancels their registration, the system marks them as Canceled. Also used when an event is canceled, the system will change all the registrations to Canceled. |
None | 1 Email sent only when an event is canceled and these registrants are moved to a canceled status |
| Attended | This is a status used for the post-event process. This status marks the registrant as being present in the event. | None |
How to Manage Waitlisted
The Event Manager will manually move a registrant from waitlisted to registered when there is a space for them in the event.
1) From the Home Page, select Events - Last 90 Days.
2.) Select the record by clicking the event name.
3.) From the related lists, under the Event Registrations section, click View All.
4.) Click the drop-down arrow of the registrant record you want to modify and select Edit.
5.) Edit the status from Waitlisted to Registered and save changes. For paid events, an extra step is needed:
a) Send an invoice via Paypal (their chapter Paypal account). Make sure that their payment is confirmed before moving on to the next step below (b)
b) Then in Engage, change from Waitlisted to Registered, enter Event Amount paid, and check Paid.
Manually Add Registrants to an Event
1) From the Home Page, select Events - Last 90 Days. Note: Other list views can also be used here: Upcoming, Need Action, Completed.

2.) Select the record by clicking the event name.

3.) From the related lists, under the Event Registrations section, click New.
4.) In the New Event Registration window, you can enter the name under Registrant. If the registrant already has a contact record in the system, select their name for the drop-down results.
5.) Select a Status Registered/Attended.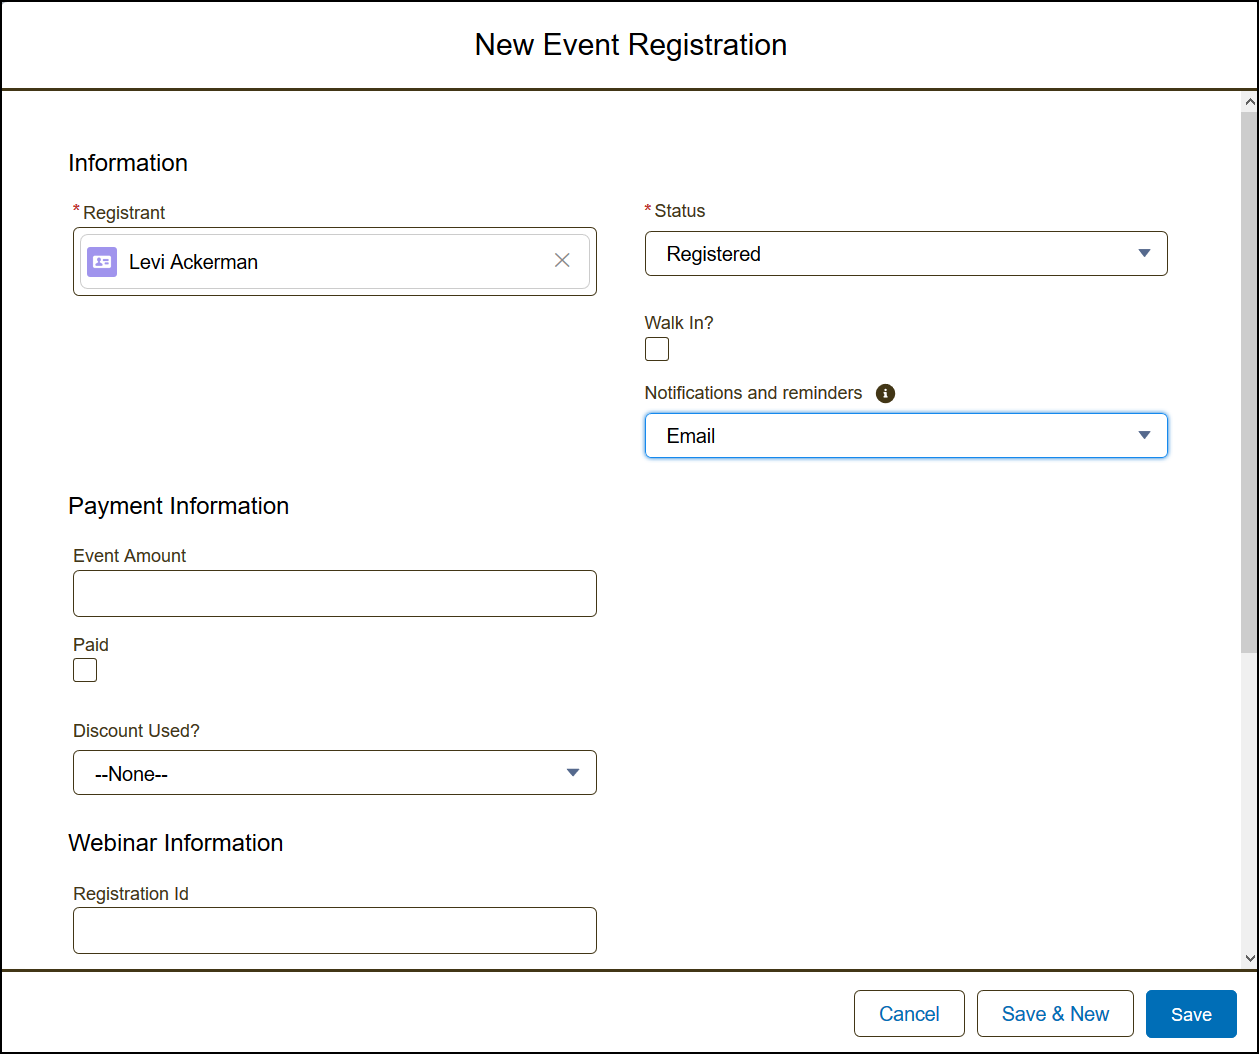
Best Practices in Managing Registrations:
- Always ensure that registrants are registering online via the event registration page instead of manually adding them in the event.
- When adding a registrant, check the registration list before adding/creating a new registration for them.

